The Perfect KDE4 Setup

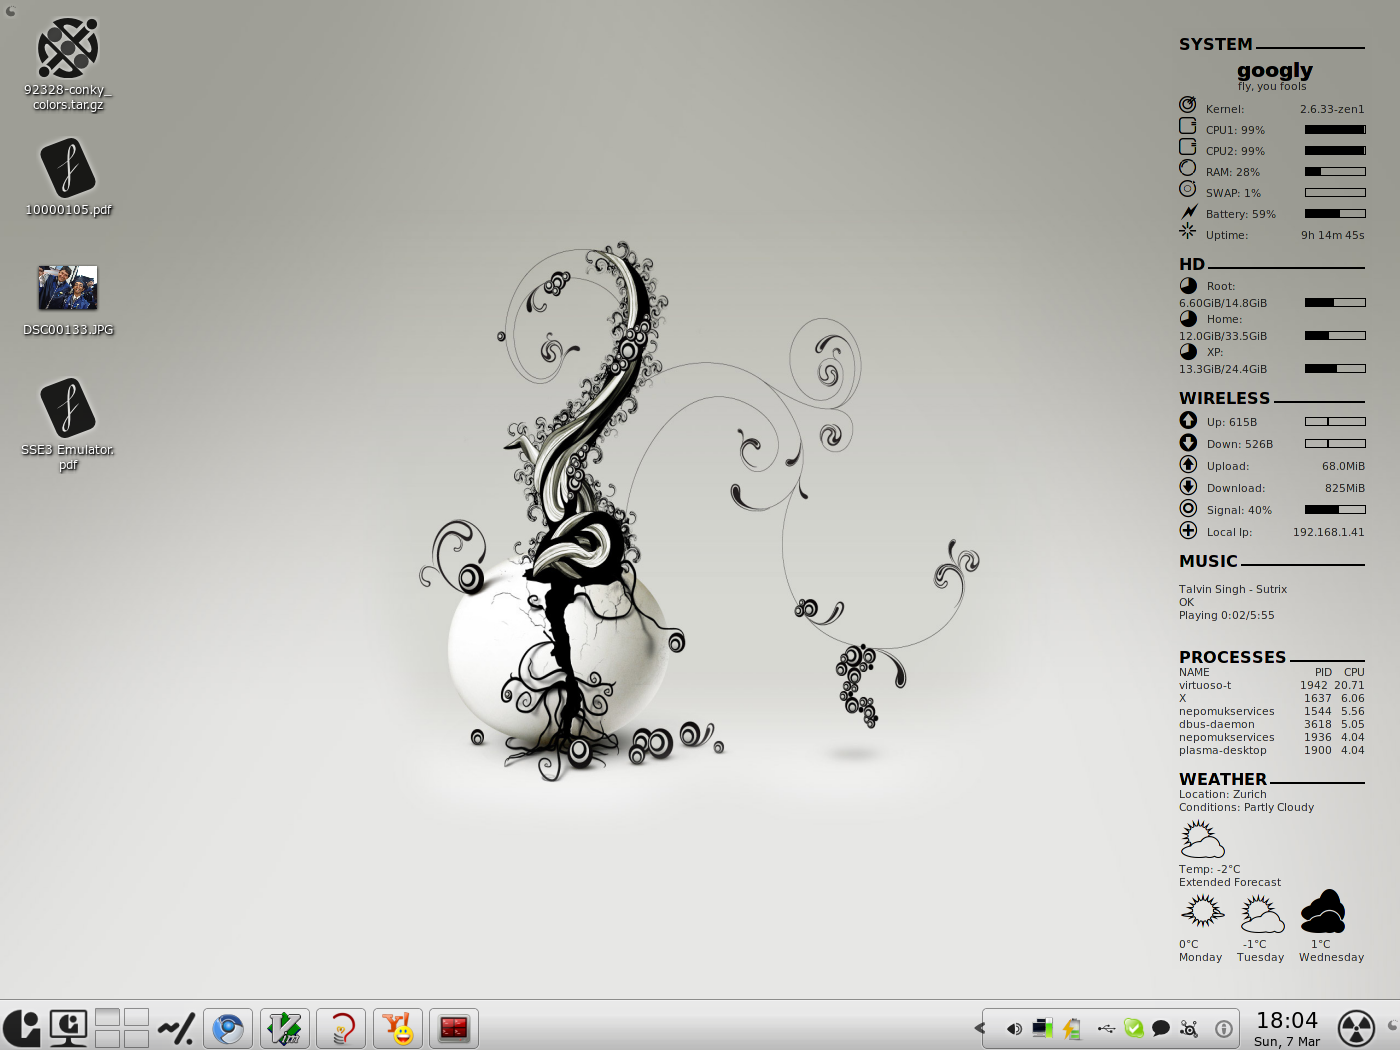
Let me first present to you how this would look like – you can then see whether you want to continue with this or not.

A clean view of the KDE Desktop

KDE Desktop with Applications

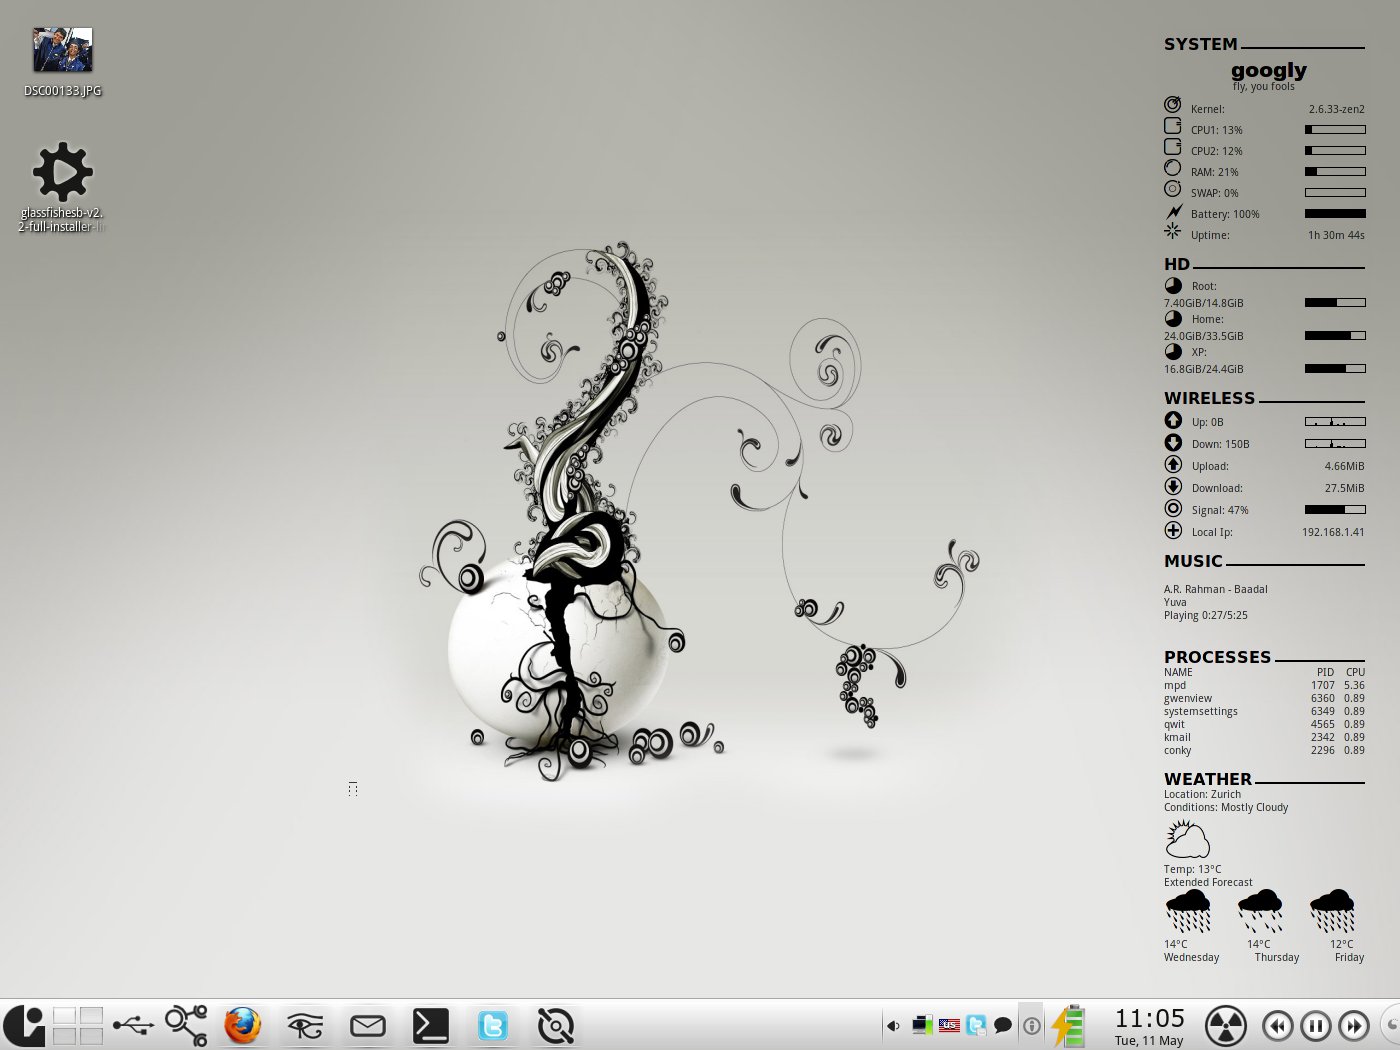
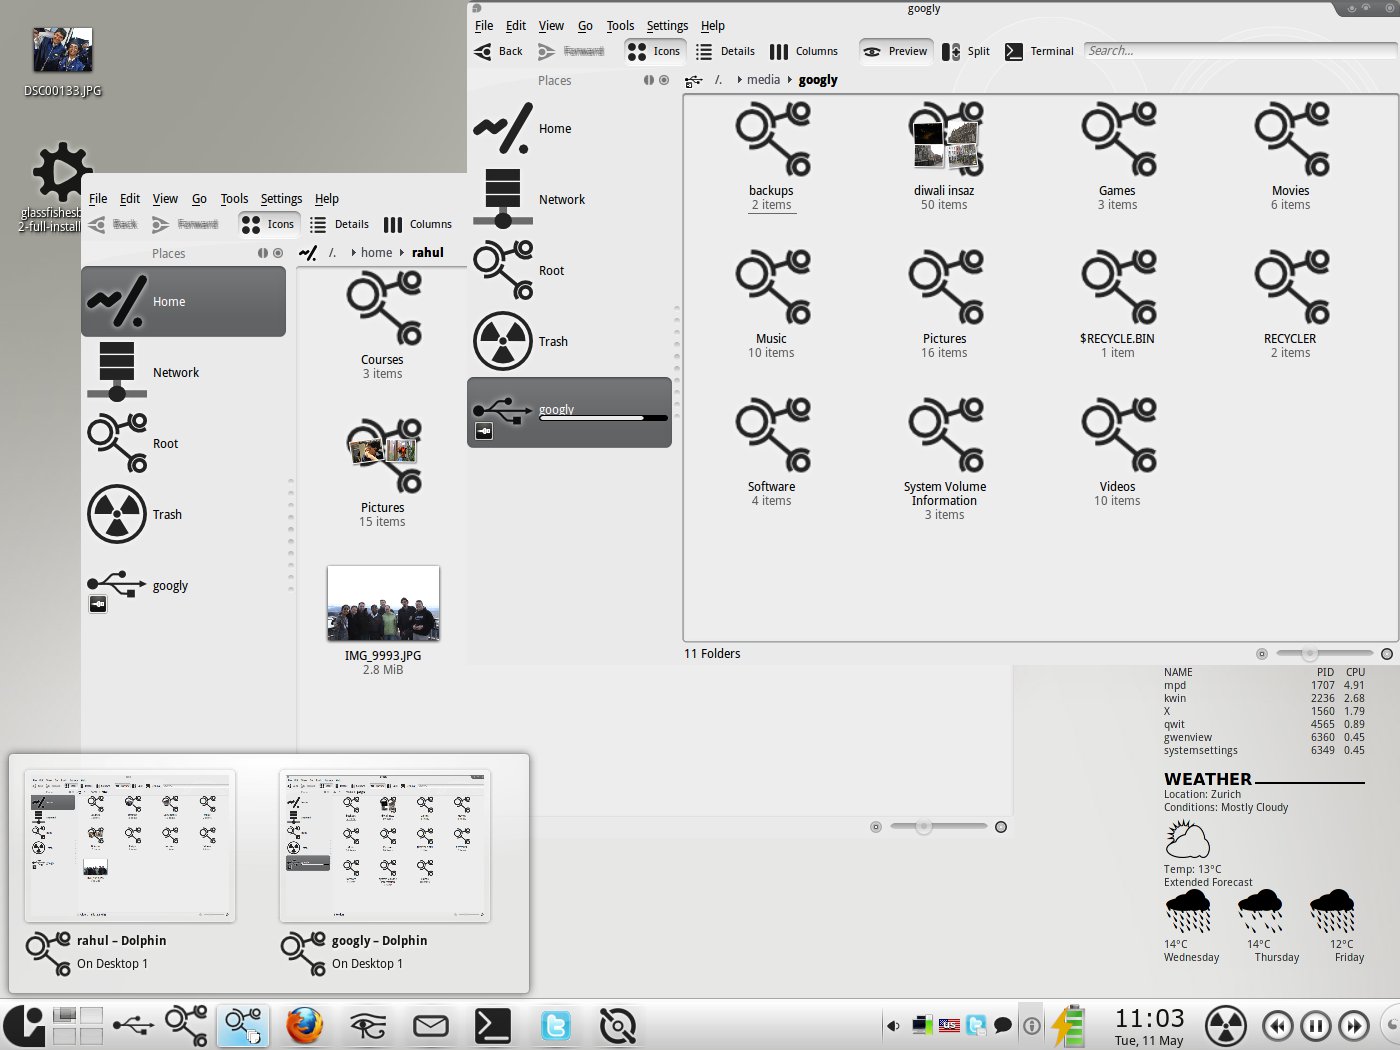
Now, if you feel that this is right for you, feel free to carry on.

First of all, to allay any claims of shameless plagiarism, this guide is inspired from the perfect guide which is available at Ubuntu Evolution (dead link)- in fact, the guidelines for Ubuntu users has been copied verbatim from there. Other users could also head over there if they want an alternative to the visual theme that will be provided here. The major difference is that this guide also deals with ways to integrate applications like skype, firefox, etc. into the provided visual theme.

Installing the Bespin Theme (Gentoo Users)

  • You must have layman configured and installed. If not, have a look here.
  • layman -L -k         // As root, to refresh your list of overlays
  • layman -a kde    // As root, add the kde overlay (this is where you will find the bespin theme)
  • emerge x11-themes/bespin

Installing the Bespin Theme (Ubuntu Users)

Rather than repeat the excellent tutorial by Ubuntu Evolution, I encourage you to head over there (dead link) and follow the section “Downloading and Installing of Bespin Style”. Also make sure that you install the development libraries that are mentioned there in the paragraph before this section.

Installing the Bespin Icon Theme (Gentoo Users)

I am acting under the assumption that you already have the bespin theme installed. The following instructions assume this. The instructions in italics are to be carried out as root, whereas the instructions in normal typeface need not be carried out as root.

  • cd /usr/portage/distfiles/svn-src/bespin/cloudcity/icons/
  • cp config.example config     // Note: I have not edited the config.example file – you are free to edit it if you like
  • sh generate_kde_icons.sh
  • cp -rf nmfnms/ $(USER)/.kde4/share/icons/
  • cd $(USER)/.kde4/share/icons/
  • chown -R $(USER):$(USER) nmfnms/
  • chmod -R 755 nmfnms/
  • Now select the icon theme from System Settings -> Appearence -> Icons.

Installing the Bespin Icon Theme (Ubuntu Users)

Ubuntu users would do well to head over again to the Ubuntu Evolution post (dead link) and follow the section Bespin Icon Theme.

KDM Theme

My recommendation would be to use lzfy as your KDM theme. Feel free to try out the Bespin KDM theme as suggested by Ubuntu Evolution.

Ksplash Theme

I rather prefer the Glassified splash theme. I would like to use the KStarBoard theme – however it does not work for me. I don’t quite know why. However, I have created a B/W mod the KStarBoard mod of this theme – it is available here. I think it would go rather well with the setup – use it if it works for you. That mod has been lost recently.

Colour Scheme

You can download the colour scheme here. To add this Colour Scheme use System Settings -> Appearence -> Colors. The colour theme, too, has been lost in a recent outage. It was a mod of this theme. Thanks to Ivan (see comments below), I have a copy of the colour scheme. You can download it here. Once again, thanks Ivan!

Bespin Theme

The Bespin Theme is available here. To activate this simply follow the following steps:

  • System Settings -> Appearence -> Style -> Select Bespin.
  • Bespin -> Configure -> Presets -> Import (simple.bespin – the theme you downloaded above) -> Load.
  • Tip: Tab Animation does not work uniformly on all hardware. You might want to disable it. Go to Bespin -> Configure -> Tabs -> Animated Transition -> None -> OK.

Window Decorations

  • System Settings -> Appearence -> Window Decorations
  • Select Bespin
  • Border Size -> Tiny
  • Buttons -> Icons -> The Rob (3rd gen)
  • Apply

Plasma Theme

I prefer the theme “Air for netbooks” (and I don’t use a netbook :P) which comes bundled with KDE SC 4.4. There is also a plasma theme which is catered for Bespin users – you can find it here. Use whatever suits you. 🙂

The Smooth Tasks Plasmoid

This is what provides the Windows 7 look to the System Taskbar. Head over to its kde-look page to get instructions on how to install it. Gentoo users can install the package kde-misc/smooth-tasks which is available in the kde layman – which as you might recall, we have already acquired.

Some specific Smooth Tasks settings.

  • General -> Grouping -> By Program Name.
  • General -> Sorting -> Alphabetically.
  • General -> Filters -> Only show tasks from the current desktop.
  • Appearance -> Tool Tip -> Tool Tip Style -> Smooth
  • Appearance -> Tool Tip -> Preview Style -> New

There are a plethora of other settings that you can play around with, but I would recommend the above for a “smooth” experience.

Other Recommended Plasmoids

Applications

  • smplayer – download the bespin icon theme for smplayer here.
  • kopete – I would recommend the Perfect Adium Pushpin chat style.
  • firefox – sadly there is no matching firefox theme. If someone can make one, I would be obliged. Meanwhile, I use the Oxygen theme and vimperator.
  • skype – use the latest 2.1 beta 2 (for linux) skype. This has support for Qt Styles – and works perfectly with the bespin theme.
  • Gtk Apps – this is always a pain. There really is no gtk theme that I have found which goes well with bespin. I am currently using Clearlooks – if anyone can find/make a theme which goes well with bespin, well I would indeed be grateful.

That is all I can think of for now. If you would like to know something more, feel free to comment.

P.S. For those of you who are interested in the conky configuration, have a look see here.

The Perfect Conky Setup

A picture is worth a thousand words, have a look for yourself.

Conky on KDE4

So, how to get this goodness on your computer. Quite easy. Simply follow the following steps and you will have a similarly amazing desktop.

  • Firstly, install conkyForecast.
  • Gentoo users, go here.
  • Ubuntu users, head over to here.

Everyone now head over to weather.com and register yourself. Obtain your XML Partner ID  and License key. Use the following command to search for your location code. Change Zurich to your city name.

$ curl http://xoap.weather.com/search/search?where=Zurich

You can then get the location code from the output of the above command.

Next, copy the conkyForecast configuration file over to your home folder and fill in the Partner ID, Location Code and License Key.

cp /usr/share/conkyforecast/conkyForecast.config ~/.conkyForecast.config
vi ~/.conkyForecast.config

Download the conky configuration file from this link and save it to your home folder as .conkyrc.

Now download Conky Colors from gnome-look. Extract the archive and install all the fonts that are present in the package. Even though not all of the fonts are required for the setup (you can take a quick look at the conky configuration file to see which fonts are actually needed) the fonts are quite nice and having them on your computer won’t hurt at all.

Install conky if you have not already done so. IMP: This theme is tested with conky-1.8.0_rc2 so make sure you are using this or a newer release of conky. If you are on gnome please edit the configuration file to suit your needs (in particular change the location code to get the weather of the city you reside in) and then launch conky. If there are any particular hacks that are needed to integrate conky and gnome, my apologies for not being aware of them. Please feel free to add any such suggestions in the comments section, I will update the post with it.

KDE USERS:

If you are using KDE4, also install feh, an image loader which will help us to integrate conky seamlessly into the KDE environment. Now create this script, which we will use to launch conky.

$ nano conky.sh
#! /bin/bash
conky -&
sleep 3
feh --bg-scale `grep 'wallpaper=' ~/.kde4/share/config/plasma-desktop-appletsrc | tail --bytes=+11`

The above script is supposed to read your wallpaper settings and use that to redraw the background of conky. For some reason, it is not working for me so I hard-coded my wallpaper in to the script.

$ nano conky.sh
#! /bin/bash
conky &
sleep 3
feh --bg-scale /home/rahul/Pictures/Wallpapers/wall_abstract.jpg

Use whatever method suits you. Do remember to make the script executable.


chmod +x conky.sh

Take a final look at conkyrc. Make sure that you have the right location ID for the weather. Use KDE system settings to add this script at startup and voila! We are done. We now have the perfect conky setup. For immediate testing, launch the script.

REFERENCES:

P.S. The music part will only work if you use MPD.

Installing WordPress Locally on Gentoo

There are already a couple of informative articles on this. Good as they are, I managed to run into a couple of problems that are not detailed on these articles possibly due to the fact that they were written a long time ago. Therefore this article, to help others (and me) who in the future wish to achieve the same that I did.

USE Flags

  • dev-lang/php apache2 mysql (in addition to ones already enabled by default)
  • www-apps/wordpress vhosts

Emerge WordPress

  • emerge -av wordpress

Install WordPress using webapp-config

  • webapp-config -I wordpress 2.9 -d wordpress

Configure the MySql database

  • mysql -u root -p (login to MySql)
  • CREATE DATABASE databasename; (create a database, replacing databasename with the name that you wish to choose)
  • GRANT ALL PRIVILEGES ON databasename.* TO username@localhost IDENTIFIED by ‘password’; (Create a user for the above database, replacing username with the name that you intend to use. Similarly with password)
  • FLUSH PRIVILEGES;
  • exit

Configure WordPress

  • vi /var/www/localhost/htdocs/wordpress/wp-config.php (and verify the following settings)


// ** MySQL settings ** //
define('DB_NAME', 'wordpress');     // The name of the database
define('DB_USER', 'username');     // Your MySQL username
define('DB_PASSWORD', 'password'); // ...and password
define('DB_HOST', 'localhost');

Configure apache2

  • vi /etc/apache2/httpd.conf
  • Comment out the following line: LoadModule unique_id_module modules/mod_unique_id.so
  • Add the following to the end: ServerName localhost
  • vi /etc/conf.d/apache2
  • Add the “-D PHP5” to the options passed in APACHE2_OPTS

You are set to go

  • Start apache2: /etc/init.d/apache2 start
  • Point your browser to http://localhost/wordpress
  • Have fun

Gentoo FTW!

So, the folks at linux-mag have bench marked Gentoo(x86_64) compiled with march=core2 and -O2,-O3 or -Os and compared it with Ubuntu 9.04. While Ubuntu 9.10 is already out, the software used on Gentoo (seems that the used the stable branch of Gentoo) is closer to 9.04 than 9.10. And what do the results tell us? Exactly what we already knew. Gentoo kicks ass. We already knew that, didn’t we. However, what is interesting is that when most of the people have been harping that optimizing for a particular CPU (which I believe is the primary reason for the differences that we see) is not useful anymore, it seems that the this is really not the case. In my own experience, I concur. My Gentoo system has been far more responsive than my Ubuntu or even Arch systems ever were.

Read the full article here: http://www.linux-mag.com/id/7574/

I keep coming back to Gentoo!

I don’t know why, but somehow after using Gentoo it is impossible for me to use any other Linux Distro. I wanted to try KDE-4.1.1 quickly and I anyhow wanted to do a fresh install of my linux system (for some reason, I like reinstalling Linux) so I just went ahead and burned Kubuntu Ibex Alpha 6. No problems with the installation there, everything was as easy as pi, and then I booted into KDE-4.1.1. The first bootup was slower than an ant, and then there were all these applications installed that I did not want to be there. I wanted a pure KDE-4 desktop, no KDE-3.x app, even if that meant some loss in functionality. But, no, that is not Ubuntu’s philosophy. Nothing wrong in that, it is just not what I wanted. But I still wanted to try KDE-4.1.1 for some time, so I installed the necessary codecs and stuff and played around with it for some time. But it just felt so wrong – so unlike Gentoo. Everything was already configured, and in some cases there was no easy way to change the defaults. Most of the configuration in xorg.conf was listed as “Using Defaults” or something similar, how do I know what the defaults are? And then of course there is the fact that it is not a rolling release. And many other small issues, which without being a show stopper, were just as effective as flies and mosquitoes in irritating me. So, I could only tolerate it for 45 minutes and I went ahead and installed Gentoo again.

Sure, it took a lot longer than Ubuntu to install (compile 😉 ) everything on gentoo, yet I must say it was worth the wait. It is so easy to configure everything, just because there are no defaults, or let us say, no sane defaults. I have a resolution of 1280 X 1024 in my terminal, the font rendering is extremely smooth and is easily configurable. And yes, the system is more far more responsive and I have a pure KDE-4 system, there is no kdelibs-3* and qt-3* installed.

And in general, portage and all the gentoo associated tools feel better, maybe because I have become more accustomed to them. And final point, I do not have to install g++, it is already installed. The toolchain is already there to compile anything that I want.

Why I Use Gentoo?

So, I have been asked this question many times. And of course the assumption is that I am some sort of a masochist who enjoys wasting time on compiling packages. However, that is not entirely true. There are some other reasons why, after trying Ubuntu (started linux with it), Gentoo and then Arch I settled on Gentoo.

The main reasons in a nutshell would be:

1. Rolling Release – Arch does the same thing, while you could achieve the same if you keep using the development releases of Ubuntu. (However, once a feature freeze sets in, you have a wait of couple of months before new packages move into the repos). Arch, in fact, is more bleeding edge that gentoo. However, that is an advantage and a disadvantage as well. While it allows you to have the most bleeding edge system, minor breakdowns are expected. The same can be said for Gentoo – however, with the option of hard masking (not normal masking) a saner solution exists.

2. Portage – No other package management compares to it. Period. Not even the mighty and holy apt.

3. etc-update/dispatch-conf – Haven’t discovered a better way to manage configuration files in a better way in any other distribution. Very useful, if you like to edit your configuration files and do not want them to revert back with an update.

4. eselect – Modular configuration framework. In my opinion, the best feature of Gentoo.

5. Slotting – Install more than one version of the same package.

6. It forces you to learn command line – it is quite useful when you become used to it.

7. And before I forget, the famous USE flags. Trust me, once you get to know them, they are really helpful. And of course, there is no counterpart in any other distribution – this is a unique feature of gentoo (or rather source based distributions)

However, it is not that rosy. There are some disadvantages as well. The most obvious is the time consumed in compiling the packages and in getting the system installed. However, once everything is ready which would take anywhere between 3 days to a week, you would have a great system and you do not have to put in too much effort in maintaining it.

But still. only those who want to spend some time in building a system should try gentoo. Other than that, there is always Ubuntu, which is the best distribution if you are new to Linux.